Maximize Your Room's Corner with Crate Shelving
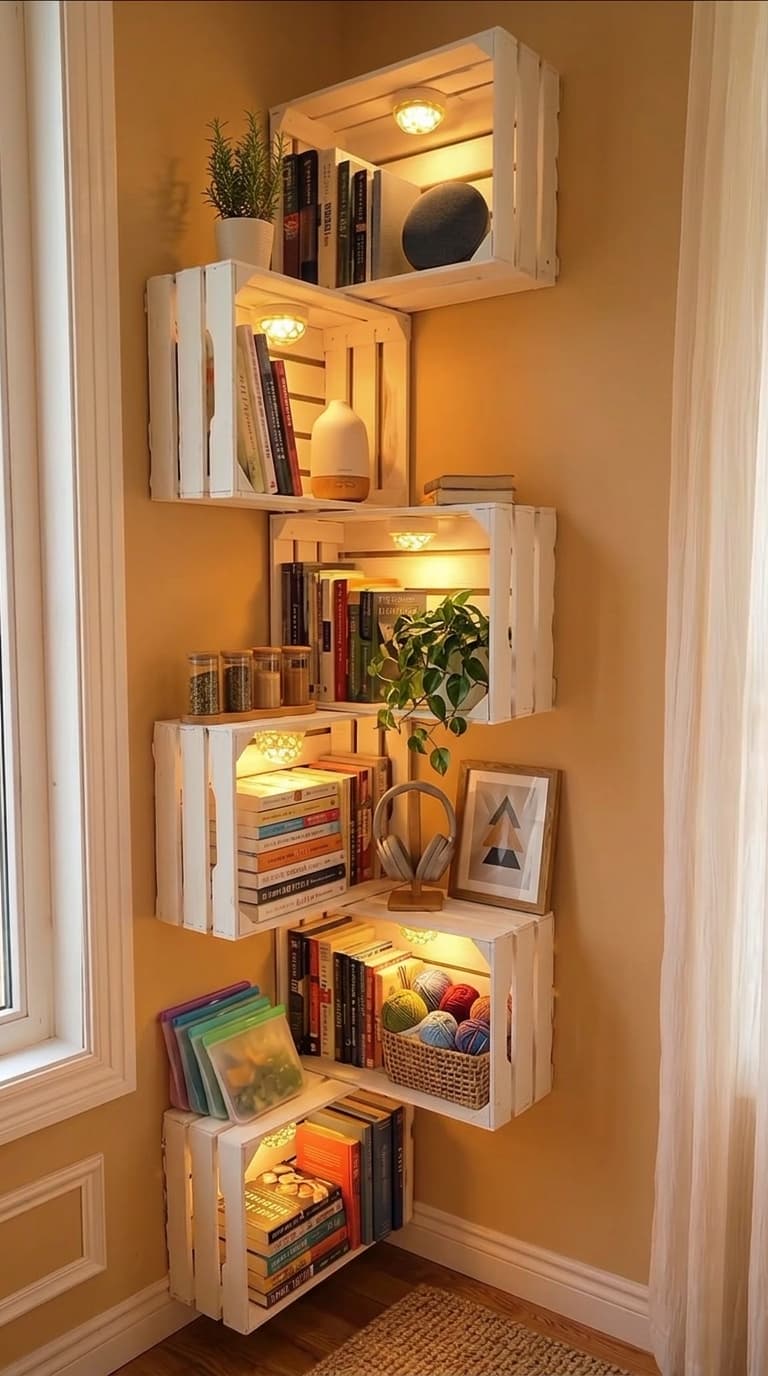
Finding storage in small rooms can be a real challenge, especially in corners that often go unused. The image shows how a simple, DIY-style shelving unit made from wooden crates can transform a quiet corner into a practical and visually appealing feature.
This setup uses vertical space efficiently, adds warmth with built-in lighting, and keeps items organized without taking up floor space. It's a perfect example of how thoughtful decor choices can make a room feel larger and more inviting.
1. Assess Your Corner Space and Needs
Before installing any shelving, measure the height and width of your corner to ensure the crate arrangement fits comfortably. Consider how much storage you need—whether it's for books, decorative items, or everyday essentials—and plan the number of crates accordingly.
Think about the weight capacity of the crates and how you'll secure them to the wall. Using wall anchors and leveling each crate during installation will prevent accidents and ensure a clean, stable look.
2. Choose the Right Crate Style and Finish
Select crates that match your room's aesthetic. The image shows white-painted crates, which add a bright, modern touch, but natural wood or stained finishes can offer a rustic feel. Ensure the crates are clean and free of splinters before use.
Avoid crates with damaged slats or loose hardware. Sand any rough edges and consider applying a clear sealant if the wood is unfinished, especially in high-traffic areas.
3. Install with Safety and Stability in Mind
Mounting crates directly to the wall requires locating studs or using appropriate wall anchors for drywall. Each crate should be securely fastened to prevent tipping, especially if filled with books or heavy items.
Staggering the crates in a stepped pattern, as seen in the image, not only looks dynamic but also helps distribute weight more evenly. Use a level during installation to keep each shelf straight and aligned.
4. Arrange Items Thoughtfully to Avoid Clutter
Group similar items together—books, plants, and decorative objects—and use baskets or containers to keep smaller items organized. The image demonstrates how a woven basket holds yarn neatly, while open shelves display books and plants attractively.
Leave breathing room between items to prevent a crowded look. Use the lighting inside each crate to highlight key pieces, but avoid overcrowding which can make the space feel smaller.
5. Enhance with Lighting and Personal Touches
The warm lights inside each crate in the image add both function and ambiance, making the space usable at night. Consider battery-operated LED puck lights for easy installation without wiring.
Add personal items like framed art, headphones, or a small plant to reflect your style. These touches make the shelving unit feel intentional and lived-in rather than just functional.
- Measure your corner space before purchasing or building the crate shelving unit.
- Ensure each crate is securely mounted to the wall with appropriate hardware.
- Use a level during installation to keep all shelves straight and aligned.
- Group items by category and use containers to maintain visual order.
- Incorporate lighting to highlight features and improve usability in low light.
- Add personal decor items to make the space feel welcoming and unique.
- Regularly review and adjust items to prevent clutter and maintain balance.